Hello! Today we are going to walk through decentralized messaging in Eppie CLI. To be honest it is 99% the same as using conventional email, and does not need its own tutorial, but let’s say you haven’t tried Eppie CLI at all.
It is is not real decentralized network right now. Just a small testnet we run on Azure cloud. But it’s already there and worth a try, if you are waiting for this functionality. Real users help tremendously with the development. The more of your feedback we have, the sooner the real decentralized network comes live. So please do test it, and tell us what you think!
Download and set up Eppie CLI
You may get Eppie CLI from our GitHub. There you can find links to the latest binaries or instructions to build your own, if you choose to do so. We’ll keep it short here.
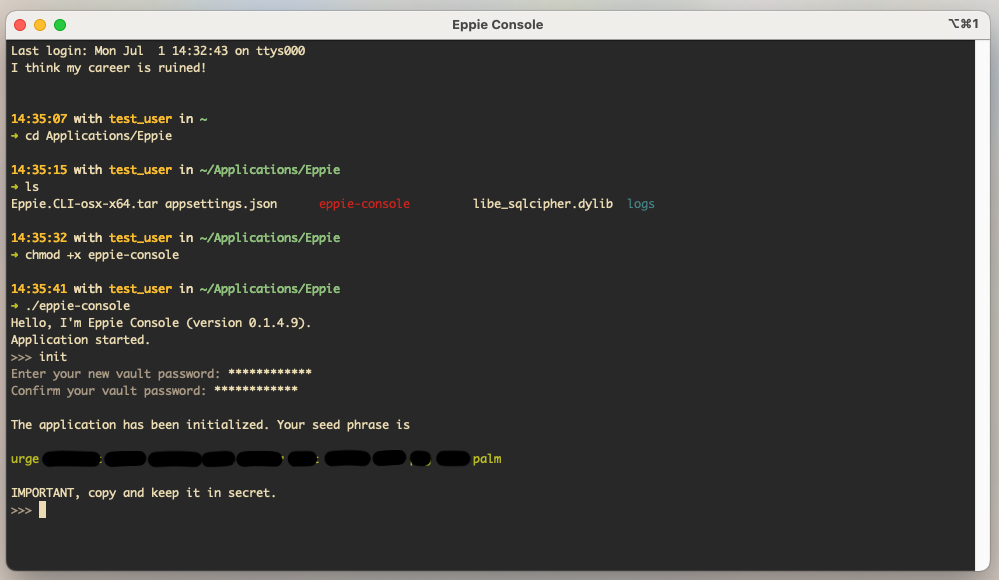
Extract the package (assuming you downloaded the executables) anywhere you like. Open your terminal, navigate to the folder. If you are on a MacOS or Linux run chmod +x eppie-console to give Eppie permission to execute.
Run Eppie: ./eppie-console on MacOS or Linux, eppie-console.exe on Windows.
Generate a local Eppie account with init command. Create good long a password and write down your seed-phrase. Never share it with anyone.
How to navigate Eppie CLI
The command line interface is pretty standard and easy to learn.
To see what commands are available run -?, -h, or --help.
Any time a command needs additional arguments run it and the application will tell you what kind of information it requires.
Let’s try add-account.
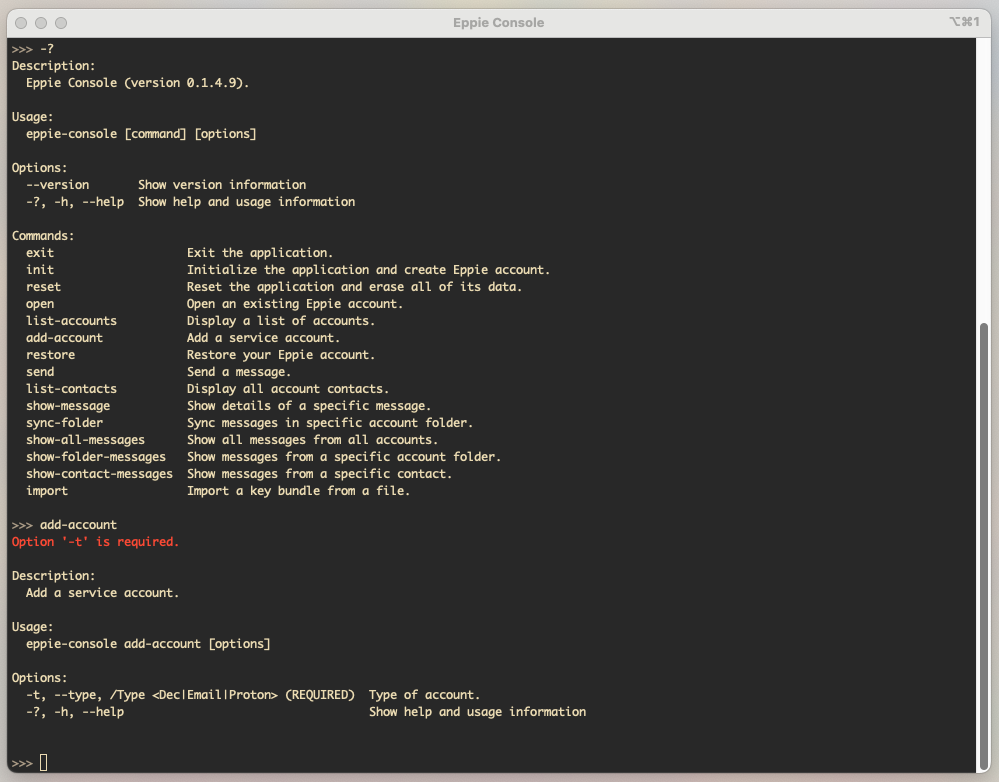
As you can see add-account needs a parameter -t, which is the type of email. Eppie supports three:
Email— normal email, lile Gmail, Microsoft Outlook etc.Proton— which is defferent because Proton Mail uses SRP (Secure Remote Password) protocol for authentication, so connecting Eppie to Proton account is implemented differently. In this post we explain the process of connecting Eppie to Proton Mail account. Althogh UX-wise they are very intuitive and similar.Dec— stands for decentralized, which we are going to try now.
Create a decentralized account and send a message
So let’s run add-account -t Dec.
This is it. Now you have a decentralized mailbox in Eppie testnet!
It is just a couple of IPFS nodes we run on Azure cloud. Not that much decentralized yet. But this is how it will work when we launch actual decentralized network.
Try running list-accounts to see your public key/address in the network.
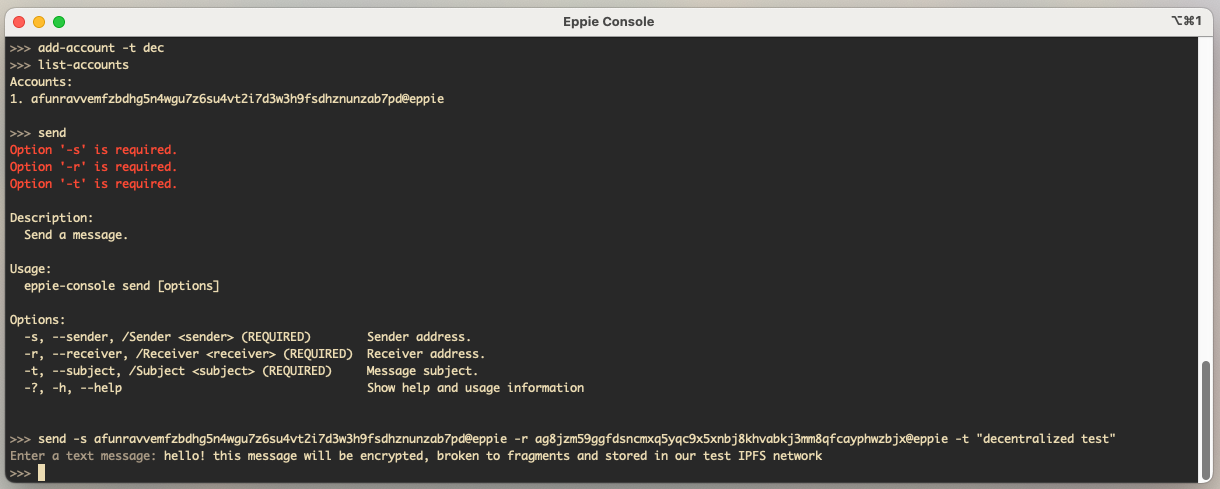
Now, let us send a decentralized message. This one needs three parameters: -s — sender, -r — receiver, and -t — subject.
So run send -s <your decentralized address> -r <receiver's address> -t <message subject>. Put subject in quotes if it’s multiple words. Write the actual message.
Receive the message
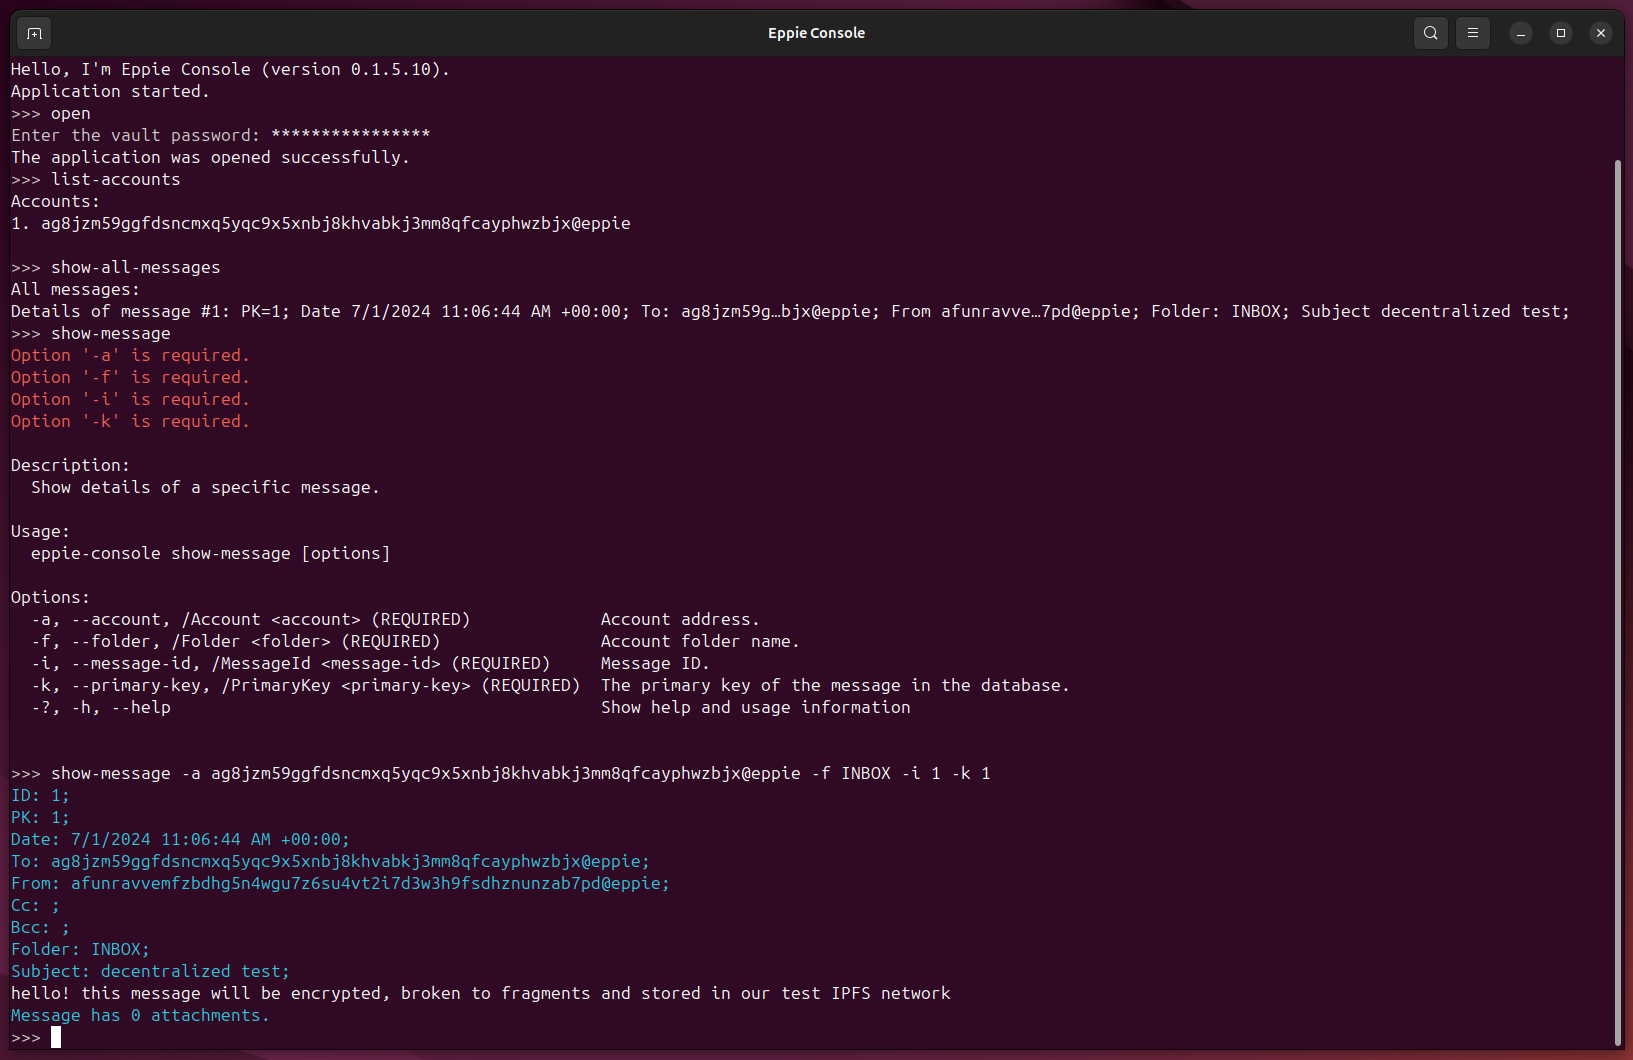
Let’s check the other Eppie account. Run show-all-messages to, well, show all messages. Here it is — our very first decentralized message in Eppie!
show-message -a <account address> -f <folder> -i <message ID> -k <message primary key> to read a particular message. All the information the command needs is in the list view we’ve seen just now.
That’s bascally it. As always, please share your thoughts with us! There’s a GitHub Discussions page right here. Also, create issues for any bugs you find. The project is huge and early in development, and your contribution will help a lot!